Category Archives: Recipes

A New Year…A New Savory Grain-Free Bread Recipe…Yum!

Savory Grain-Free Bread Recipe

Savory Grain-Free Bread Recipe

OK, this savory grain-free bread recipe is a winner!

Since Dr. Daren and I have been going Primal, I’ve been experimenting with so many grain-free recipes for breads, crackers, muffins etc. and they are sometimes good (sometimes), sometimes edible (sometimes), and sometimes funky, weird, and yucky (eeew!).  Some grain-free baking uses bean flours, such as chick pea, but beans are not part of the Paleo/Primal diet.  I have discovered I am not a fan of coconut flour, one of the alternatives to wheat in   grain-free baking.  I do however love almond flour, but it lacked the holding (binding?!) properties of other flours…in comes arrowroot powder.  So, this bread is by far my favorite grain-free bread recipeIt tastes great, has a very “bready” texture, toasts well (hello breakfast toast!) and is not a complicated recipe.

Savory Grain-Free Bread Recipe

1 1/2 cups almond flour (also called almond meal)

3/4 cups arrowroot powder (you can sub tapioca starch)

1/4 cups + 1 Tblsp pumpkin seeds, ground (ok if you don’t have a grinder, just put them in whole!)

1/2 tsp sea salt

1/2 tsp baking soda

1/2 cup pecorino or parmesean cheese

2 Tblsp fresh rosemary, finely chopped

1 tsp freshly ground black pepper

5 eggs

1 1/2 tsp apple cider vinegar


Preheat oven to 325F.  Line a loaf tin with parchment paper.

Place the almond flour, arrowroot powder, 1/4 cup pumpkin seeds, sea salt, baking soda, cheese, rosemary and pepper in a medium sized bowl, mixing together to break up any lumps.  In a seperate bowl, lighly beat eggs and apple cider vinegar.  Add the wet ingredients to the dry bowl and mix together. Pour the mix into the lined pan and sprinkle 1 Tblsp of pumpkin seeds on top.  Bake 30-35 minutes or until a skewer inserted comes out clean.


Please try this savory grain-free bread recipe, you will like it!

Leave a Comment

Filed under healthy alternatives, nutrition, Recipes

Mason Jar Salads?

Yes! Mason Jar Salads!

I should have a “where have I been?!” category (you saw my epiphany over almond milk right?)  Once again in my perusing of food blogs I find a brilliant idea that sadly isn’t mine-

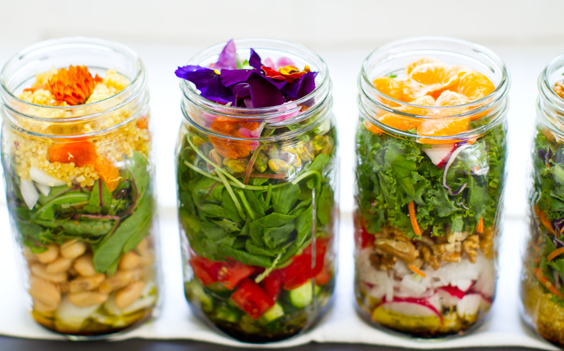
Mason Jar Salads

These salads are as beautiful as they are convenient.  Apparently they stay fresh for days (although I haven’t tested that theory out for myself…yet) & they look good enough to eat!  The basic build is dressing on the bottom (vinaigrette, creamy herb, homemade ranch…your favorites!) next you put in items that can stand up to soaking in dressing such as cucumbers, carrots, beans, radishes, onions-again, your favorites…then, above them you layer in anything else you want in your salad, and pack in some greens on top!  You can google Mason Jar Salads like I did and search images.  I only look at the ones that caught my eye-but there are so many out there I’m sure you’ll find ones that appeal to you!

Mason Jar Salads

These were the prettiest ones I found, thanks to Kathy at Healthy Happy Life and her blog post here .  Pretty right?!  Makes you hungry for salad right?!

There are some great tips I found here at another blog for keeping crunchy things (croutons, nuts…) crunchy, and stinky things (blue cheese) from smelling up your whole jar.

I’m so sad I already ate lunch today because now I really want a salad…a pretty, pretty salad!  Well, I guess I’ll just have to prepare some Mason Jar Salads tonight and see which one I get tomorrow!  (bet it’s pretty!)

Leave a Comment

Filed under healthy alternatives, nutrition, Recipes

Homemade Almond Milk…it’s so easy!

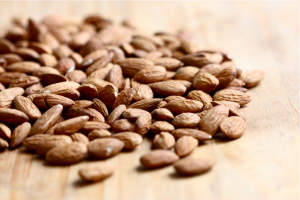
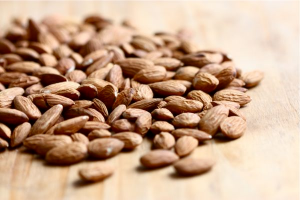
Almonds waiting to become almond milk!

Really, Homemade Almond Milk is super easy!

OK, I consider myself a good cook, an informed cook even, and someone who has been on a path to better health through nutrition for years now.  So, when I was watching a show on PBS about healthy cooking (I think the show had Michele Beschen of b. organic on it but I’m not sure, oops!), how surprised was I when the very lovely lady (who I can’t name, again, oops!) made her own Almond Milk I was dumb struck!  And to learn people have been doing this for a very long time-what?!-duh, where did I think the people who make commercial Almond Milk got the idea from?!  You may remember from a previous post how much I love Almond Butter, and that still remains one of my favorite things, however, I have a new obsession in making

 Homemade Almond Milk!

It is seriously so easy you’re going to wonder why every single one of your neighbors isn’t doing this- everyday.  Oh, and have you read the label on the packaged Almond Milk?  You want to know what is in mine?!  Almonds and water. (I know!!)

Almond Milk

Now, there are as many recipes for Homemade Almond Milk as there are almonds…well, maybe not that many, but some people put stuff in theirs that I don’t find necessary, like sweetners, emulsifiers, flavors.  I like to keep mine plain.  If I want to make a sweet drink with it, I’ll sweeten it then, I also want the option of putting it in something salty, again, adding salt to it then.  Some people insist on using blanched almonds so the skins don’t dirty the milk…I don’t find that a problem and I’m sure part of the good stuff is in the skins!  Basically the only rule I have is 1 cup of nuts to 4 cups of water.

So, make your own-here’s how:

Homemade Almond Milk Recipe  

Step 1: soak 1 cup raw almonds in water overnight

Step 2: drain and rinse almonds and put in blender

Step 3: put 4 cups clean water in blender and blend for 1 minute

Step 4: pour mixture into a nut milk bag  (or save yourself a few dollors and get a grain bag!) over a bowl to drain

Step 5: squeeze all of the delicious milk out of the pulp (and reserve the pulp for later…I’ll have a recipe for you!)

That’s it!  viola!  Ta da!

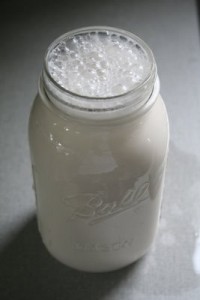
Homemade Almond Milk!

Warning! I’m going to blow your mind again…you can make nut milk with other nuts!  I’ve made Walnut Milk too! (had to use 2 cups of walnuts per 4 cups water because 1 cup was too watery)  And plan on making cashew milk (actually cashew cream-as I hear it’s divine…basically to make nut cream, you use a tighter ratio-more like 1:1 or 1:2 nuts to water) in the very near future.  Did I mention I’m obsessed?

3 Comments

Filed under healthy alternatives, nutrition, Recipes

Homemade mint skin toner


Try this homemade mint skin toner!

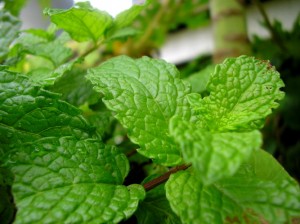
homemade mint skin toner

Cleanse and tone your skin with this DIY natural mint skin toner. In a few steps, you’ll have a great toner that is free of synthetic chemicals and much less expensive then store-bought brands. Apple cider vinegar is packed with alpha-hydroxy and amino acids that help to dissolve dead skin cells, balance the pH level of skin and stimulate blood circulation. The acetic acid in apple cider vinegar stimulates the capillaries under the skin, leaving you with a soft glow. Made with simple ingredients everyone is likely to have on hand — a pinch of mint from the pots on your front porch (or your Lady Moon Farms produce box, or the grocery store!), some apple cider vinegar, and distilled water. This is homemade skin toner that you could eat. Your skin absorbs 70% of what you slather on it; so why would you want to put weird chemicals and other junk on it just to make it feel nice? I started doing for my skin care products what I’d done with my food — looking at ingredients labels. Skin toner, lotion, gentle cleansers. It didn’t matter. They were all costly and had labels that read like chemistry textbooks. So, I stopped using them. I started using skin care products that I could happily eat (no, I don’t eat them).

Apple cider vinegar alone makes a useful astringent that can help clear up oily or blemished skin, but many find the scent to be too off-putting or the straight vinegar to be too acidic. That’s where this recipe for homemade mint skin toner comes to the rescue. The mint infusion makes the skin toner pleasant, and the added water dilutes the acidity to the perfect levels for daily use. Among the benefits: it helps even out skin tone and smoothes out your skin’s texture, helps minimizes the size and appearance of pores, dries up and reduces redness from breakouts almost over night, and helps regulate oil production and impart’s a radiant glow. Sounds like a winner to me!!

I’m already a huge fan of vinegar in general-I add plain white vinegar to my washing machine because it eliminates ground-in odors and helps prevent colors from fading (and no, your clothes don’t come out of washing machine smelling like salad dressing-you can’t even smell it) as well as to my dishwasher in lieu of “Jet Dry” because it prevents streaks and spots on dishes.Yay vinegar!  Ok, here it is:

Homemade Mint Skin Toner Recipe

3 Tablespoons fresh mint

2 Tablespoons Apple Cider Vinegar

1 Cup distilled water

1.  Chop fresh mint and put it in a glass jar

2.  Add vinegar and water to jar and put the lid on

3.  Let sit for 3 days at room temerature to steep

4.  Strain into clean container and apply with a cotton ball (or you can use a spray bottle and spray directly on your face) after cleansing

Using this toner is just one way to reduce your chemical exposure, but keep up the good work and keep reading those labels!

*UPDATE 01/20/2012 : OK, I’ve been using this homemade mint skin toner on my face for a week now, and let me tell you, I love what it is doing for my skin tone.  I’m less dry, less noticeable splotchiness…It does still have a funky scent-it is vinegar after all-but the smell goes away as soon as it dries!  Try it, you’ll like it!

Leave a Comment

Filed under healthy alternatives, Recipes

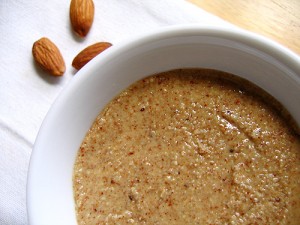
Almond Butter Recipe

Let me tell you a few things about my Almond Butter Recipe:

1. This Almond Butter Recipe couldn’t be easier!

2. I love Almond Butter!

3. If you’ve never had Almond Butter I am sad for you!

4. I love Almond Butter!

5. It appears I love exlamation points almost as much as I love Almond Butter!

OK, I’m done.  I want you  to love Almond Butter too.  I promise if you make this recipe, and spread it on a piece of warm toast you won’t regret it.  I promise.  Almond Butter in stores can be very expensive, but making it at home doesn’t require much work and is basically the price of your almonds, AND you know exactly how fresh it is.  You do have to have a food processor (which I can not and will not live without!)-oops another exclamation point slipped in there, sorry, but it felt necessary.Almond Butter Recipe

    The Almond Butter Recipe

3 cups raw almonds, preferably organic

2 Tablespoons olive oil

1 teaspoon sea salt

Whiz almonds and olive oil in food processor, scraping down sides, until smooth.  Add sea salt and process until incorporated.

VERY IMPORTANT NOTE:  adding salt early will cause the nuts to seize and processing will take a really long time.

This recipe makes about a week’s worth of Almond Butter for our house.

Almond Butter Recipe

YUM!

That’s it!  I told you it was easy!  This Almond Butter Recipe is so delicious, it’s great on toast for breakfast, on crackers or apple slices for a snack, in smoothies, on celery…make it. eat it. love it.  So simple, so delicious, you’ll love it!  I promise!

Leave a Comment

Filed under nutrition, Recipes

Nutty Balls…a (life saving) recipe

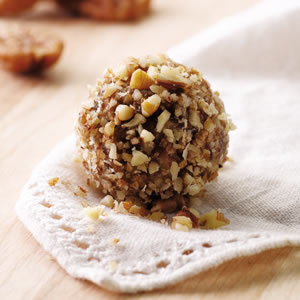
Nutty balls?!  You betcha!  These Nutty Balls were created by me for some quick energy on a trip this weekend (and boy were they needed!)  This last weekend was a weekend of “Plan B”.  Ever have one of those?  A weekend where nothing that was planned works out, and a second Plan B must be implemented?  If not…lucky you!  If you know what I’m talking about then you need to put these nutty balls in your emergency (back up, go to, oops, not now) kit, or your cooler, whatever.   

I modified a recipe from one of my favorite cookbooks:  Nourishing TraditionsThese are yummy, healthy, and a great energizing snack in between meals.  My nutty balls contain cocoa powder so they do have caffeine, however you can replace the cocoa powder with carob powder (just double measurement) which is caffeine free.  This recipe makes about 16-20 nutty balls.

You will need:

  • 2 cups + 1/2 cup raw (preferably organic) almonds
  • 3 oz sesame seeds
  • 1/4 cup cocoa powder (or 1/2 cup carob powder)
  • 1/2 cup honey (preferably raw)
  • 1 Tblsp vanilla extract (preferably organic)
  • 1 tsp sea salt
  • 1  6 oz package fresh, unsweetened, coconut (I find this in the freezer section at my grocery store)


  1. Grind the 1/2 cup almonds in food processor (not too fine) and set aside in a bowl
  2. Put remaining 2 cups almond in food processor and grind fine but not to the point your making almond butter (a recipe I’ll share later!)
  3. In a bowl, mix cocoa powder, honey,vanilla, and sea salt and add this mixture to processor
  4. Add coconut meat and sesame seeds to processor and pulse all ingredients until just combined
  5. Roll heaping tablespoonful between hands forming a ball and place in previously ground almonds to coat.  Set on parchment paper (or foil, or plastic) on a cookie sheet and continue until all of the mixture has been used up.
  6. Place nutty balls in fridge…they will set up in the cold.  I do this then put them in a storage container.  Keep stored in the fridge.


I hope you will try to make this Nutty Balls recipe, it is super easy and so delicious!  Enjoy!

Leave a Comment

Filed under nutrition, Recipes